Unlock Killer Saltwater Jigging Techniques: What I’ve Learned After Thousands of Drops
By Adam Hawthorne | Last Modified: May 9, 2025
The first time I tried saltwater jigging, I was on my buddy Dave’s boat in the Gulf of Mexico about 12 miles off Pensacola. I brought the same lightweight jigs I’d been using for crappie back in Michigan. Let’s just say the 15-pound amberjack that hit my line wasn’t impressed with my gear selection – snapped my line in about two seconds flat. Dave still gives me grief about that one, especially since he had to lend me gear for the rest of the trip.
After thousands of drops and frankly, some embarrassing failures, I’ve figured out what actually works when it comes to jigging in saltwater. Lot of fancy articles talk about jigging like it’s rocket science. It’s not. But there are definitely techniques that separate the guys who consistently catch fish from the ones who just get tired arms.
The Real Truth About Saltwater Jigging Techniques
Let’s get straight to it. Jigging in saltwater environments is fundamentally different from freshwater jigging, and not just because the fish are bigger. The entire approach changes when you’re dealing with stronger currents, greater depths, and frankly, fish that fight like they’re possessed.
I’ve been testing different jigging methods for three decades now, from the flats of the Florida Keys to the deep offshore waters of the Gulf, and even in the cold waters off New England during a particularly memorable (and freezing) trip with my brother-in-law Paul back in 2019. That trip taught me more about cold-water jigging in three days than I’d learned in the previous five years.
Most articles will give you a generic list of jigging techniques without telling you when and where to use them. That’s useless. Instead, I’m going to break down exactly which techniques work in specific situations, based on what I’ve actually experienced – not theory.
Speed Jigging: Not What Most Anglers Think
Speed jigging gets a lot of hype, but most anglers completely misunderstand what it’s really about. It’s not just frantically yanking your rod up and down like you’ve had too much coffee.
The first time I tried proper speed jigging was off Marathon Key with Captain Jose who’s been guiding there for 23 years. I thought I knew what I was doing until he watched me for about 30 seconds, laughed, and said “That’s not speed jigging, that’s just looking silly.”
Here’s what actual speed jigging involves:
- Using the right jig – slim, aerodynamic butterfly-style jigs in the 5-9 oz range for most situations
- A strong but fast drop to get the jig to the target depth quickly
- Short, powerful, CONSISTENT upward strokes (about 1-2 feet)
- Maintaining the rhythm even when your arms are burning
- Letting the jig flutter down on semi-slack line
The rhythm is what most people get wrong. They start off fast, get tired after 45 seconds, then slow down. Fish notice that inconsistency. I’ve found almost robotic consistency works better even if your overall pace is a bit slower.
I now use this technique primarily for tuna and amberjack when they’re holding at mid-depths (80-150 feet). Last October, I was fishing the rigs about 28 miles south of Venice, Louisiana, and speed jigging was absolutely crushing the blackfin tuna at about 120 feet, while guys dropping bait were getting nothing.
Speed jigging is exhausting though – I rarely use it for more than 20-30 minutes at a time. My fishing buddy Tom tried to speed jig for two hours straight our last trip out, and he could barely lift his burger to his mouth at dinner. Moderation matters.
Slow Pitch Jigging: My Go-To in Deeper Water
Slow pitch jigging has become extremely popular in the last few years, and there’s a good reason for it – it flat-out works, especially in deeper water where standard techniques fail. I first learned about it from Japanese slow pitch jigging resources about seven years ago, well before it became mainstream in the US.
Unlike speed jigging, slow pitch relies on the rod doing most of the work. The specially designed slow pitch rods have a unique action that gives the jig its erratic, injured-baitfish movement.
The basic technique:
- Drop your jig to the desired depth
- Give a gentle upward motion (6-12 inches)
- Then immediately begin lowering your rod tip while maintaining tension
- The rod “loads” and then releases, causing the jig to dance
- Repeat this motion while very slowly working the jig upward
I spent an entire summer trying to figure this technique out. To be totally honest, I was terrible at it for the first few months. The breakthrough came during a trip near the Middle Grounds off Tampa when I finally got the rod motion right. Caught 13 different species that day including some monster grouper.
The problem with most slow pitch tutorials is they make it sound too technical. After practicing it for years, I’ve found it’s more about feeling the weight of the jig through the rod than precisely following a set of mechanical instructions. You need to develop a rhythm that works with your particular rod, jig, and depth.
What I find works best is focusing on making the jig “hang” momentarily at the top of each bounce. That slight pause triggers a lot of strikes for me, especially from grouper and snapper. My theory is that it mimics a disoriented baitfish – easy prey for opportunistic predators.
When using a 180-200g Seafloor Control jig (my personal favorite around structure), I’ll use a slightly longer pause at the top of the motion. In current, I’ve had to adjust to a shorter stroke with faster rod action to maintain control of the jig. Every situation requires slight adjustments.
Vertical Jigging in Strong Currents (What Actually Works)
Dealing with strong currents is probably the biggest challenge in saltwater jigging. I’ve seen plenty of anglers give up after their line gets swept away from the boat at a 45-degree angle, making it nearly impossible to effectively work the jig.
During a particularly brutal day in the Florida Current just east of Key Largo (4+ knot current), I learned some valuable lessons from a local captain named Mike who’s been guiding there for over 30 years.
The crucial adjustments for strong currents:
- Go heavier than you think necessary – In heavy current, I’ve had to use jigs up to 12 oz just to maintain vertical presentation. Don’t be afraid to size up dramatically.
- Work with the drift, don’t fight it – Instead of trying to maintain position, work with your captain to systematically drift over productive areas. This requires good communication with whoever’s driving the boat.
- Short, powerful strokes – In heavy current, I’ve found that shorter, more powerful jigging motions (8-10 inches maximum) maintain better control than wider sweeps.
- Use braided line with minimal stretch – I switched all my jigging setups to 50-65lb braid years ago and would never go back to mono for this application. You need that direct connection.
- Let it hit bottom occasionally – In current, I like to occasionally let my jig tap the bottom to recalibrate my sense of where it is in the water column.
My most productive day jigging in heavy current happened just last year around the East Florida shelf edge in about 220 feet of water with a ripping Gulf Stream current. Using a 10 oz knife jig and the short-stroke technique, I landed nine amberjack and a surprise 30-pound African pompano while the other boat in our group caught almost nothing using traditional bottom fishing techniques.
I’ve also found that sometimes in extreme current, completely counterintuitive approaches work. During one trip off Marathon, we turned into the current, used heavy jigs, and barely moved them – just held them in place fighting the current. The slight wobble from the current was enough to trigger strikes from yellowtail snapper when nothing else worked.
Inchiku and Tai-Rubber Techniques (Almost Nobody Uses These Right)
I first encountered the inchiku style jig during a trip to Okinawa about eight years ago, and it completely changed how I approach certain fishing scenarios, especially around structure and for more finicky bottom species.
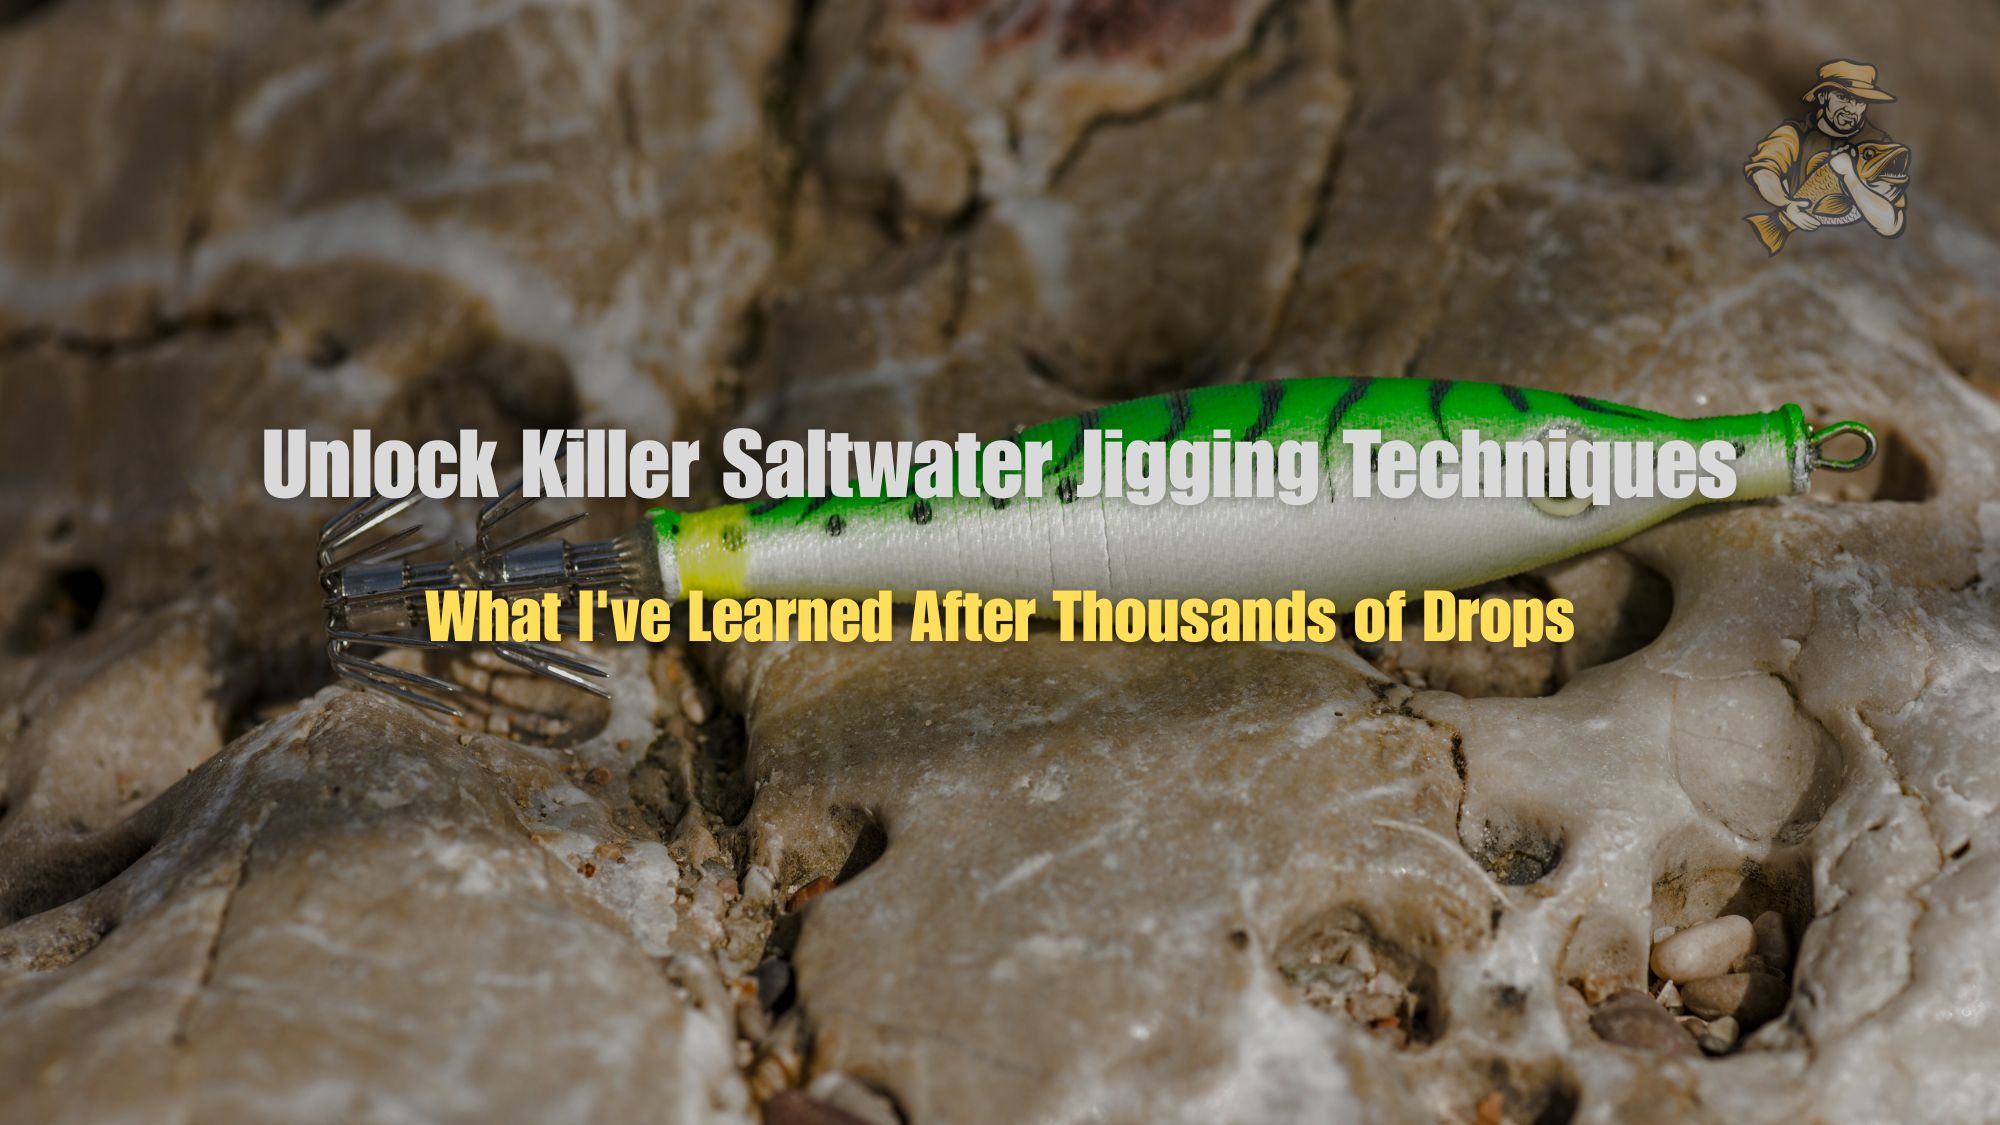
For those unfamiliar, inchiku jigs have a weight head with assist hooks plus a lower skirt or rubber tentacles that create an octopus/squid appearance. They’re absolutely deadly when used correctly for everything from grouper to snapper.
The proper technique is quite different from standard jigging:
- Drop to the bottom and lift the rod tip just enough to get the jig off the bottom (about 2-3 feet)
- Hold it there with small, subtle rod tip movements (6-inch movements or less)
- Wait longer than feels comfortable between movements (this is key)
- Periodically drop it back to tap the bottom, then slowly raise again
Patience is absolutely critical with this method. Most anglers move it way too much. I’ve sat there making tiny movements for 3-4 minutes before getting crushed by a big grouper who had probably been eyeing it the whole time.
The tai-rubber technique is similarly effective but uses a different style of jig with additional rubber skirts. I’ve had tremendous success with these around reefs in 70-120 feet of water, particularly for triggering bites from wary mutton snapper and red grouper.
Just this past spring, I was fishing some limestone ledges about 15 miles offshore from Naples with my brother James. Nothing was hitting our traditional jigs or even live bait. I switched to a 150g blue/pink inchiku and slowed way down, barely moving it. We ended up catching seven fat red grouper in about an hour after switching approaches.
One time I actually fell asleep for a few seconds while working an inchiku super slow (embarrassing, I know). When I jerked awake, that small movement triggered an immediate hit from a 22-pound gag grouper. Sometimes less really is more.
The Equipment That Actually Matters (And What’s Just Marketing Hype)
With saltwater jigging becoming trendy, manufacturers are pushing all kinds of specialized gear. Some of it’s worth the money. Most of it isn’t.
After spending more money than I’d like to admit on jigging gear over the years, here’s what actually matters:
Rods: Where You Shouldn’t Compromise
The rod is where specialized jigging equipment makes a legitimate difference. I resisted buying a proper jigging rod for years, thinking my standard offshore rods were sufficient. I was completely wrong.
Purpose-built jigging rods have:
- Specific actions designed for particular jigging techniques
- Better balance for long jigging sessions
- Enough backbone to handle big fish while maintaining sensitivity
For speed jigging, I use a Shimano Trevala 6’3″ extra-heavy. For slow pitch, I’ve actually found that the Japanese-made jigging rods perform noticeably better than most American brands, though they’re expensive. I personally think the Majorcraft Skyroad slow pitch series offers the best value for money.
The difference between a proper jigging rod and a standard rod became painfully obvious during a trip to the oil rigs off Louisiana. I was using my specialized jigging setup while my friend used his standard bottom fishing rod. After an hour, his arms were destroyed while I could have kept going all day.
Reels: High Retrieve Rate Matters More Than Brand
While there are plenty of reels marketed specifically for jigging, what really matters is:
- A high retrieve rate (at least 40+ inches per crank)
- Smooth drag that won’t stutter under pressure
- Comfort during long jigging sessions
- Adequate line capacity for your depth/target species
I’ve had $700 specialized jigging reels and $200 standard spinning reels. The truth? The performance difference rarely justifies the price gap for most recreational anglers.
I currently use Shimano Saragosa 8000-10000 series for most of my jigging. They’re not specifically “jigging reels” but they perform extremely well at about half the price of specialized models. I’ve caught tuna over 70 pounds on them without issues.
The one exception is for dedicated slow pitch jigging, where the specialized reels with higher gear ratios do make a noticeable difference. But even then, you don’t need to spend $800+ on a JDM reel.
Line Selection: Simpler Than It Seems
Line choice for jigging gets overcomplicated in a lot of articles. Here’s what works based on my experience:
- Main line: 40-65lb braided line for almost everything. I’ve had good experiences with both PowerPro Maxcuatro braid and Daiwa J-Braid Grand, though there are many good options.
- Leader: 60-80lb fluorocarbon for most applications, going heavier around structure. Seems thick but you need the abrasion resistance more than you need invisibility at depth.
- Connection: FG knot for connecting braid to leader – nothing else I’ve tried is as reliable and smooth through guides.
I used to obsess over line color until I did side-by-side testing with different colored lines on the same trip. The result? Virtually no difference in catch rates. Now I just use high-vis yellow for better visibility.
Jigs: Size and Action Trump Color and Brand
I’ve accumulated hundreds of jigs over the years – different colors, styles, and brands. After all that trial and error, here’s what I’ve learned:
- Weight/size matters most – Having the right weight for the conditions trumps everything else
- Profile/action comes second – How the jig moves through water is critical
- Color matters, but less than you think – I’ve narrowed down to just a few color patterns
For knife jigs, I generally use blue/silver or pink/silver in clear water, and orange/gold or glow patterns in murky water or very deep. For slow pitch, I’ve had best results with jigs that have a wider, flatter profile that creates maximum flutter.
Some of my most productive jigs are from small companies most people have never heard of. The Magnum Deep Drop Series from a tiny company in Clearwater has outfished expensive Japanese jigs for me on multiple occasions targeting grouper in 250+ feet.
Situation-Specific Jigging Approaches
Jigging isn’t a one-size-fits-all technique. Here are the specific approaches I’ve found work best in different situations:
Jigging Around Structure and Reefs
Structure fishing requires specific adjustments:
- Position your boat up-current from the structure when possible
- Use slightly heavier jigs than you would in open water
- Try a more vertical presentation with less aggressive movements
- Be prepared to horse fish away from structure immediately
- Consider using shortened leaders (18-24″) to have more direct control
During a trip to the Marathon Hump, I watched anglers around me lose jig after jig in the structure. By positioning properly and using more controlled jigging motions, I managed to land several nice grouper without losing gear.
Reef edges where current meets structure have been particularly productive for me. The mouth of a channel between Looe Key and American Shoal has a rocky edge in about 90 feet that consistently holds permit and cobia. A slow, twitchy retrieve with a diamond jig tipped with squid strip has been incredibly effective there.
Jigging for Pelagic Species in Open Water
When targeting pelagic species like tuna, kingfish, or amberjack, the approach changes:
- Look for current breaks, temperature changes, or bait schools
- Use faster, more aggressive jigging techniques
- Cover water vertically rather than horizontally
- Pay attention to the depth where strikes occur
- Be prepared for long runs
One of my most memorable days was jigging for yellowfin tuna about 50 miles off Venice, Louisiana. We located a temperature break on the boat’s sounder, marked bait at 150-180 feet, and used 7oz butterfly jigs with a very aggressive speed jigging technique. Ended up with seven yellowfin between 40-60 pounds in just under two hours.
One trick I’ve found for kingfish is to occasionally just stop jigging and let the jig flutter down on slack line. Probably 70% of my kingfish strikes now come on that flutter.
Shallow Water Jigging Techniques That Actually Work
Most jigging articles focus on deep water, but jigging can be deadly in shallow water too (under 30 feet), especially around bridges, piers, and inlets.
For shallow jigging, I make these adjustments:
- Downsize dramatically – 1/2 oz to 2 oz jigs max
- Use much longer, sweeping jigging motions
- Incorporate more pauses and directional changes
- Pay more attention to tide movement
- Use lighter tackle overall for better presentation
Some of my best pompano, Spanish mackerel, and even permit have come from shallow water jigging around bridges and passes in the Florida Keys.
I remember one February morning jigging around the bridge pilings at Channel 5 Bridge near Islamorada. Water was crystal clear, about 8 feet deep with a ripping tide. Using a 3/4 oz diamond jig with a very slow lift-and-flutter technique right along the edge of the pillings, I landed 11 pompano in about an hour. Nearly had my rod ripped from my hands by what I’m pretty sure was a giant permit, but that’s another story.
Seasonal Jigging Patterns I’ve Discovered
What works changes dramatically with seasons. Here are some patterns I’ve observed:
Summer Jigging (June-September)
During summer in the Gulf and South Atlantic:
- Fish often hold deeper to escape the heat
- Early morning and late evening bites are typically more aggressive
- Speed jigging produces better in summer than slower techniques
- Working jigs through thermoclines can trigger reactive strikes
- More frequent but shorter bursts of action
Last August during a particularly brutal heatwave, we were struggling to find cooperative fish off Destin until we located a slight temperature break at 140 feet. By working butterfly jigs right through that thermocline with an aggressive speed jigging technique, we triggered competitive feeding from a school of amberjack.
Winter Approaches (November-February)
Winter jigging requires adjustments:
- Slower, more deliberate presentations
- Often need to jig closer to structure
- Bites tend to be more subtle
- Color becomes more important (I’ve had best success with glow/UV options)
- Longer, more patient approaches in a single area
During a January trip near the Dry Tortugas, water temps had dropped to around 68°F. Nothing was hitting our usual jigs until we switched to slow pitch technique with glow/blue jigs worked right along a ledge at 190 feet. The action was much more subtle, but we ended up with a great mixed bag of snapper and grouper.
Spring and Fall Transition Periods
These are often the most productive jigging times, but require adaptability:
- Fish can be anywhere in the water column
- Multiple techniques might work on the same day
- Paying attention to bait movement is crucial
- Being ready to switch approaches quickly
Last April, we were fishing some wrecks about 22 miles off Sarasota. Started the morning catching grouper on slow pitch jigs worked near bottom, then around midday the kingfish showed up mid-water column. By quickly switching to speed jigging techniques, we were able to catch both species on the same spot.
I’ve noticed during these transition periods that having multiple rods rigged with different jig types can make a huge difference in success rates.
Common Jigging Mistakes I See Almost Every Trip
After decades on the water and spending way too much time observing other anglers, here are the most common mistakes I see:
- Using too light jigs for the conditions – Probably the #1 issue. If your line isn’t reasonably vertical, your jig is too light.
- Jigging too aggressively in the wrong situations – I see anglers frantically working jigs when a slower approach would be more effective, especially for bottom species.
- Not paying attention to where in the water column fish are holding – Many anglers waste time working the bottom when fish are suspended, or vice versa.
- Fighting fish improperly on jigging gear – The specialized rods require different fighting techniques than standard rods. Keep the rod tip up and let the rod do the work.
- Giving up too quickly – Jigging can be a waiting game. I’ve seen countless anglers switch methods after just 5-10 minutes without success.
Last summer, I watched a guy on a charter frantically jigging with far too light a jig in strong current. His presentation was completely ineffective – jig swept away with the current instead of maintaining a vertical position. After 10 minutes, he gave up, declaring “jigging doesn’t work.” Meanwhile, those of us using proper weights and techniques were catching fish consistently.
My Actual Go-To Jigging Setup (Not What Most “Experts” Recommend)
Rather than give you some idealized, unaffordable setup, here’s what I actually use most often:
- Rod: 6’2″ Shimano Trevala medium-heavy for most jigging, Majorcraft Skyroad slow pitch rod for specialized slow pitching
- Reel: Shimano Saragosa 10000 with upgraded drag washers
- Main line: 50lb PowerPro Super8Slick V2 (high-vis yellow)
- Leader: 60-80lb Seaguar Blue Label fluorocarbon
- Jigs: 5-9oz butterfly/knife jigs for speed jigging, 160-250g slow pitch jigs, various inchiku jigs for bottom species
This setup has landed everything from 20lb snapper to 70lb yellowfin tuna, and it won’t completely destroy your bank account.
I should mention that I did briefly try one of those ultra-expensive Japanese slow pitch combos (over $1,500) that my friend Mike let me borrow. Yes, it was noticeably better, especially the rod’s action. Was it worth three times the price of my setup? For professional guides or tournament anglers, maybe. For weekend warriors like me, definitely not.
Jigging Retrieval Patterns That Trigger Strikes
The specific movement patterns you impart to your jig can dramatically impact strike rates. Here are some retrieval patterns I’ve found particularly effective:
The Dying Baitfish Flutter
This works especially well for grouper, snapper, and amberjack:
- Lift your jig with a moderate 1-2 foot upward sweep
- Let it flutter down on semi-slack line
- Watch for strikes on the fall (most will come here)
- If no strike occurs, give a slight twitch just as it completes its fall
- Repeat
This mimics a injured baitfish – one of the most productive triggers for predatory fish. The subtle twitch at the bottom often converts followers into strikers.
The Yo-Yo Retrieve
Most effective for tuna, kingfish, and other pelagic speedsters:
- Employ a consistent up-down rhythm
- Use shorter strokes (8-12 inches)
- Maintain a relatively quick pace
- Occasionally throw in a pause to change the pattern
- Keep constant tension
The consistency of this retrieve triggers competitive feeding behavior, especially when multiple fish are present.
The Bottom Bump
This one’s deadly for bottom dwellers like grouper:
- Let your jig hit bottom
- Give a sharp upward jerk of 2-3 feet
- Let it flutter back down while maintaining slight tension
- When it hits bottom again, pause for 2-3 seconds
- Repeat the sequence
The bottom contact creates a small puff of sand or silt, mimicking a feeding baitfish and triggering predatory instincts. I started using this technique after watching how effective it was for specialized bottom jigging experts in some online forums.
Fishing Around the Rigs – A Jigging Paradise
Some of my most productive jigging has happened around offshore oil and gas platforms, particularly in the Gulf of Mexico. These massive structures hold incredible concentrations of fish at various depths.
Here’s my approach to jigging around rigs:
- Position upwind/upcurrent and drift toward the structure
- Start jigging as soon as you’re within casting distance
- Work various depths – don’t just focus on the bottom
- Pay special attention to the down-current side where predators often wait
- Be prepared to move and reset your drift frequently
During a memorable trip to the rigs about 30 miles south of Port Fourchon, we found amberjack holding at around 100 feet on the down-current side of the platforms. Using 7oz knife jigs with aggressive retrieves, we landed over 20 amberjack in a single afternoon, most between 20-35 pounds.
One interesting pattern I’ve noticed is that different species often hold at specific depth ranges around the same structure. On that same trip, while the amberjack were at 80-120 feet, we found cobia closer to the surface (15-40 feet) and red snapper tighter to the structure near bottom.
When to Jig, When to Switch Techniques
As much as I love jigging, it’s not always the most effective approach. Knowing when to switch techniques can save a trip.
Signs that jigging may not be the best approach:
- No marks on the fish finder despite being in productive areas
- Multiple drops without any follows or strikes
- Very dirty/murky water conditions
- Extremely strong currents that prevent proper presentation
- When fish are very scattered rather than concentrated
During a trip off Key West last year, we started the day jigging without success. After about an hour with no action, we noticed birds working bait schools about a half mile away. Switching to casting techniques with surface lures produced an immediate blitz of bonito and kingfish.
Similarly, there are days when the fish simply want a static bait. Last summer near the Middle Grounds, jigging produced only a few small snappers, but switching to bottom fishing with cut bait resulted in larger mangrove and red snapper from the same spots.
Being adaptable is more important than being stubborn. I always have at least one rod rigged for alternative techniques when I’m primarily jigging.
FAQ About Saltwater Jigging
What’s the best color jig for saltwater jigging?
This depends on water clarity and conditions. In clear water, I’ve had most success with blue/silver, pink/silver, and green/silver combinations. In murky water or deep conditions, orange/gold, chartreuse, or glow patterns tend to perform better. Rather than stocking dozens of colors, I focus on having the right weights and profiles, with just 4-5 proven color patterns.
How deep can you effectively jig?
With modern equipment, effective jigging is possible to depths of 400+ feet, though it becomes increasingly physical work. My personal comfort zone is 40-250 feet. Beyond that, the physical toll makes other techniques more practical for recreational fishing. If you’re regularly jigging deeper than 250 feet, electric reels or specialized deep-drop techniques might be more appropriate.
Is expensive jigging gear really worth it?
From my experience, specialized jigging rods do make a significant difference in both effectiveness and fatigue reduction. For reels, mid-range quality is usually sufficient for most anglers. For jigs themselves, having the right weight and action matters far more than brand name. Some of my most productive jigs cost under $15, while I have $40 jigs that rarely produce.
What’s the most common mistake beginners make when jigging?
Without question, it’s using jigs that are too light for the conditions. I see it constantly – anglers using 3-4oz jigs in conditions that require 7-8oz to maintain proper presentation. If your line isn’t staying relatively vertical, size up your jig weight. You simply cannot effectively work a jig that’s being swept away in the current.
How important is retrieve speed when jigging?
Extremely important, but highly variable based on species and conditions. I’ve found that amberjack, tuna, and kingfish often prefer faster, more aggressive retrieves, while grouper and snapper typically respond better to slower, more deliberate movements with longer pauses. The best approach is to vary your retrieve until you find what’s working on a given day.
Final Thoughts on Saltwater Jigging
After thousands of drops across dozens of destinations, I’ve come to see jigging as possibly the most versatile and engaging way to catch saltwater fish. There’s something deeply satisfying about working a jig properly and feeling that sudden, violent strike that nearly rips the rod from your hands.
What I love most about jigging is that it puts you in direct contact with the fish – you feel every head shake, every surge, every attempt to reach structure. It’s active fishing that keeps you engaged rather than passively waiting for something to happen.
The techniques I’ve shared come from hard-earned experience, plenty of failures, and constant refinement. What works best isn’t always what looks prettiest or matches what YouTube experts demonstrate. It’s what actually produces fish consistently in real-world conditions.
If you’re new to saltwater jigging, start with the basic techniques, invest in at least one quality jigging rod, and focus on mastering proper presentation before worrying about having every color and style of jig. Being able to effectively work a few jigs is far more productive than having a tackle box full of options you can’t present properly.
For experienced jiggers looking to improve, I’d suggest focusing on slowing down your presentations, particularly around structure. The most common mistake I see even among experienced anglers is working jigs too aggressively when a more subtle approach would be more effective.
Whatever your experience level, keep experimenting, stay curious, and don’t be afraid to try unconventional approaches. Some of my most productive techniques came from “mistakes” that ended up triggering unexpected bites.
Tight lines, and may your next drop be met with that unmistakable thump of a quality fish.

Meet Adam Hawthorne
I’m a lifelong fishing enthusiast who’s spent years exploring rivers, lakes, and oceans with a rod in hand. At Fishing Titan, I share hands-on tips, honest gear reviews, and everything I’ve learned about fish and ocean life, so you can fish smarter and enjoy every cast.
Share:

Meet Adam Hawthorne
I’m a lifelong fishing enthusiast who’s spent years exploring rivers, lakes, and oceans with a rod in hand. At Fishing Titan, I share hands-on tips, honest gear reviews, and everything I’ve learned about fish and ocean life, so you can fish smarter and enjoy every cast.
Related Articles
-
Marble Molly
The Marble Molly (*Poecilia latipinna*) stands as one of the most recognizable and widely distributed ornamental fish species in the aquarium trade, distinguished by its…
-
Endlers Livebearer
The Endlers Livebearer (Poecilia wingei) stands as one of the most captivating freshwater fish species in the aquarium trade and aquatic biology research. This diminutive…
-
Balloon Molly
The Balloon Molly (*Poecilia latipinna* var.) represents one of the most distinctive and popular ornamental fish varieties in the freshwater aquarium trade. This selectively bred…
-
Bora Bora Fishing: What I Learned After 3 Failed Trips
I still remember staring at those impossibly blue waters on my first morning in Bora Bora, thinking I was about to experience the greatest fishing…
Fish Species
-
Caribbean Reef Shark
The Caribbean Reef Shark (*Carcharhinus perezi*) stands as one of the most recognizable and ecologically significant predators patrolling the warm waters of the western Atlantic…
-
Hammerhead Shark
The Hammerhead Shark represents one of the most distinctive and fascinating apex predators in marine ecosystems worldwide. These remarkable cartilaginous fish, scientifically classified under the…
-
Whale Shark
The whale shark (*Rhincodon typus*) stands as the ocean’s largest fish species, representing one of nature’s most remarkable gentle giants. Despite its imposing size, reaching…
-
Tuxedo Platy
The Tuxedo Platy (Xiphophorus maculatus) stands as one of the most recognizable and beloved freshwater aquarium fish species, distinguished by its striking black and white…

