How to Spool a Baitcaster for Beginners: 6 Simple Steps
By Adam Hawthorne | Last Modified: April 26, 2025
I remember the first time I tried spooling a baitcaster reel. What should have been a simple 15-minute job turned into a frustrating hour of tangled line, uneven spools, and plenty of colorful language. But don’t worry – with the right approach, learning how to spool a baitcaster properly is actually pretty straightforward.
Baitcasting reels can significantly improve your casting distance and accuracy, but only when they’re spooled correctly. Improper spooling leads to backlash, reduced casting distance, and plenty of on-the-water headaches. Let’s fix that.
In this guide, I’ll walk you through exactly how to spool a baitcaster reel the right way – with the perfect tension, proper line capacity, and techniques to prevent those frustrating bird’s nests that plague many beginners.
How to Spool a Baitcaster: The Essential Steps
Before diving into the step-by-step process, let’s get your supplies ready. You’ll need:
- Your baitcasting reel (attached to rod for easier handling)
- Fishing line appropriate for your reel (monofilament, fluorocarbon, or braided)
- Scissors or line clippers
- A pencil or dowel rod (to hold the line spool)
- A small piece of electrical tape
- A towel or cloth (to handle the line without oils from your fingers)
Now that you’re equipped, let’s get started with the process. Follow these six steps carefully for the best results.
1. Prepare Your Reel and Line
First things first – prep work makes all the difference when learning how to spool a baitcaster properly.
Make sure your baitcaster is clean and the old line is completely removed. Check that all components are working smoothly. If you’re using a brand new reel, you can skip this step.
For your line, consider what you’ll be fishing for. Lighter lines (8-12 lb test) work best for smaller bass and trout, while heavier lines (14-20 lb test) are better for larger fish or fishing around cover. I’ve found that monofilament is most forgiving for beginners, but fluorocarbon offers better sensitivity, and braided line provides the most strength.
Different lines behave differently on baitcasters. The first baitcaster I spooled up had 20 lb braided line, which was probably a bit much for that particular reel. The line would dig into itself under pressure, causing all sorts of problems. Match your line to both your reel’s specifications and your fishing conditions.
Run the line through your rod guides from tip to reel before attaching it to the spool. This extra step saves frustration later.
2. Attach Line to the Spool
This is where many beginners make their first mistake – the connection between line and spool needs to be secure but not bulky.
Take a small piece of electrical tape (about 1/2 inch) and place it across the spool’s arbor (the center cylinder). This gives your line something to grip onto and prevents slippage, especially with slick lines like fluorocarbon.
Thread the line through the rod’s guides, starting from the tip down to the reel. Some people do it in reverse, but I find this direction gives you better control.
Now tie your line to the spool using an arbor knot:
- Wrap the line around the spool arbor
- Tie an overhand knot around the standing line
- Tie another overhand knot at the tag end
- Pull both ends to tighten the knot against the spool
- Clip the tag end close to the knot
If you’re using braided line, double the tape over or use a small piece of monofilament as backing before attaching the braid. This prevents the slick braided line from spinning on the spool.
3. Set the Proper Tension
Tension control is critical when spooling a baitcaster. Too loose, and you’ll get a messy spool that causes backlash. Too tight, and you’ll reduce your casting distance.
Most baitcasting reels have a tension knob on the side (typically the same side as the handle). Adjust this to apply slight pressure to the spool.
I like to hold the rod at about a 45-degree angle with the reel facing up. Apply enough tension so that when you release the spool and let the line fall, the lure descends slowly and stops when it hits the ground. If it continues to spin and create slack, tighten the tension knob slightly.
For the actual spooling process, you want to maintain consistent tension on the line as it goes onto the reel. This is crucial for preventing future casting problems.
4. Spool the Line Correctly
Now comes the main event – getting that line onto your reel properly. This step requires focus but isn’t complicated.
The key is maintaining even tension while ensuring the line goes on exactly as it comes off the supply spool. Line memory is real, and fighting it leads to tangles.
Place your line spool on a pencil or dowel so it can spin freely. Some anglers place the spool in warm water first to reduce memory and make it more pliable – a trick I learned from an old-timer that actually works pretty well.
The line should come off the supply spool in the same direction it’s going onto your reel. For most situations, this means the line should come off the supply spool counterclockwise when you’re facing the label.
Hold the line between your thumb and forefinger with slight pressure as you reel. This consistent tension is vital – not too tight, not too loose. I typically apply just enough pressure to feel a slight warmth from the friction.
Turn the reel handle slowly and steadily, guiding the line so it lays evenly across the spool. Most modern baitcasters have level-wind systems that help with this, but keeping an eye on the process ensures the best results.
Fill the spool until the line is about 1/8 inch from the rim – roughly the width of a nickel. Overfilling is a common mistake that leads to casting problems. I once overfilled a reel and spent half my fishing trip dealing with backlash rather than catching fish. Learn from my mistake!
5. Test the Spool Tension
Before heading to the water, it’s smart to test your work. This quick check can save you from on-the-water frustration.
Attach a lure of appropriate weight for your rod and line. I recommend using whatever lure you plan to fish with most often.
Set the reel’s braking system to medium if it has one.
Hold the rod at about a 45-degree angle, press the thumb bar to release the line, and let the lure fall. It should descend at a moderate pace without the spool continuing to spin once the lure hits the ground.
If the spool keeps spinning after the lure stops (creating a bird’s nest), tighten the tension knob slightly and try again.
If the lure falls too slowly, loosen the tension a bit.
Once properly adjusted, practice a few gentle casts in your yard or an open area. Start with simple overhead casts before trying anything fancier.
6. Make Final Adjustments
After your test casts, you might need to fine-tune things a bit. This is normal even for experienced anglers.
If you’re getting consistent backlash, try:
- Adding slightly more tension to the spool tension knob
- Increasing the braking system setting
- Using your thumb to feather the spool during casts
If your casting distance seems limited:
- Decrease tension slightly
- Reduce the brake setting
- Ensure you’re not overfilling or underfilling the spool
Remember that different lure weights require different settings. The settings that work perfectly for a 1/2 oz lure might cause backlash with a 1/4 oz lure. This is why many serious anglers have multiple baitcasters set up for different lure weights.
According to a survey by the Recreational Boating & Fishing Foundation, improper reel setup is one of the top reasons new anglers become discouraged. Taking the time to master this skill will significantly improve your fishing experience.
Common Mistakes When Spooling a Baitcaster
Even with careful instructions, there are several pitfalls beginners often encounter. Let’s address them so you can avoid them:
- Incorrect line capacity – Check your reel’s specifications for recommended line weights and capacities. These aren’t just suggestions; they’re engineering parameters for optimal performance. The American Sportfishing Association reports that using the wrong line weight is among the top equipment mistakes.
- Line twist – This happens when the line comes off the filler spool in the wrong orientation. Always pay attention to how the line comes off the supply spool relative to how it goes onto your reel.
- Inconsistent tension – Varying tension during spooling creates sections of loose and tight line on your spool, leading to casting problems. Use a consistent pressure technique throughout.
- Finger oils on line – The oils from your fingers can damage some fishing lines, especially fluorocarbon. Consider wearing gloves or handling the line with a clean cloth.
- Mixing old and new line – Always start with a completely empty spool rather than building new line on top of old line. This prevents uneven spooling and unexpected breaks.
I once tried to save time by putting new line over old backing, and it created a casting nightmare. The different diameters and memory characteristics caused the new line to dig into the layers below during hard casts. Not worth the headache!
Choosing the Right Line for Your Baitcaster
While this guide focuses on the spooling process, the type of line you choose dramatically affects performance. Here’s a quick overview:
Monofilament:
- Most forgiving for beginners
- Less expensive
- More stretch (good for treble-hook lures)
- Floats well
- Has more memory (can be problematic)
Fluorocarbon:
- Nearly invisible underwater
- More sensitive than mono
- Sinks (good for deep presentations)
- Less stretch than mono
- More abrasion resistant
- Often stiffer (can cause more backlash)
Braided Line:
- Incredible strength-to-diameter ratio
- Zero stretch (excellent sensitivity)
- Long-lasting
- Can be more visible to fish
- May require backing or tape on the spool
- Can dig into itself under pressure
For beginners, I usually recommend a quality 10-12 lb monofilament while learning. Its forgiveness and manageable memory make the learning curve less steep. Once you’re comfortable, experimenting with fluorocarbon or braid opens up new fishing possibilities.
The Berkley Fishing line selector tool can help you match the right line to your specific fishing conditions and target species.
Maintenance Tips to Extend Spool Life
Now that you’ve properly spooled your baitcaster, here are some tips to keep it in top condition:
- After fishing in saltwater, always rinse your reel with fresh water
- Loosen the drag when storing your reel for extended periods
- Replace your line if you notice excess memory, fraying, or discoloration
- Apply reel oil to moving parts according to manufacturer recommendations
- Store your tackle in a climate-controlled environment when possible
Research from Bass Pro Shops indicates that properly maintained fishing line can last up to 2-3 times longer than neglected line, saving you money and preventing lost fish.
Frequently Asked Questions About Spooling Baitcasters
How often should I replace the line on my baitcaster?
For monofilament and fluorocarbon, I recommend replacing the line every 3-6 months if you fish regularly (once a week or more). If you fish less frequently, replacing it once per season is usually sufficient. Braided line can last much longer – often 1-2 years – but inspect it regularly for fraying or damage.
Can I use any type of line on my baitcaster?
While technically you can use any type, baitcasters perform best with lines matched to their specifications. Most baitcasters handle monofilament and fluorocarbon well in the 8-20 lb test range. For braided line, a general rule is to use a pound test that has a diameter similar to 10-12 lb mono for optimal performance.
Why does my line keep tangling when I cast?
This classic backlash problem usually stems from improper spool tension, excessive reel speed, or trying to cast too forcefully. Start with more tension and braking than you think you need, then gradually reduce as your technique improves. The Professional Anglers Association recommends practicing in an open area like a park or yard before heading to the water.
Is it better to overfill or underfill a baitcaster spool?
Neither is ideal, but if forced to choose, slight underfilling is preferable to overfilling. Aim for about 1/8 inch (3mm) from the edge of the spool. According to Abu Garcia, one of the leading baitcaster manufacturers, proper fill level is crucial for optimal casting performance.
Do I need special tools to spool a baitcaster?
While there are line spooling tools available, they’re not necessary. The basic supplies mentioned in this guide are sufficient. However, if you spool reels frequently, a line spooling station can save time and ensure consistent tension.
Final Thoughts on Mastering Your Baitcaster
Learning how to spool a baitcaster properly is one of those fundamental skills that pays dividends throughout your fishing career. A well-spooled reel casts farther, operates more smoothly, and causes fewer headaches on the water.
The process might seem technical at first, but after doing it a few times, it becomes second nature. I can now spool a baitcaster in about 10 minutes while watching fishing shows from my living room couch.
Start with more forgiving settings and gradually work toward optimizing for distance as your skills improve. Remember that different lures and fishing situations might require different tension and brake settings.
If you’re just starting out with baitcasters, pair these spooling tips with practice in an open area before hitting the water. Your casting accuracy and distance will improve dramatically with just an hour of focused practice.
Got questions about spooling your particular baitcaster model? Drop a comment below, and I’ll do my best to help you out. Tight lines!

Meet Adam Hawthorne
I’m a lifelong fishing enthusiast who’s spent years exploring rivers, lakes, and oceans with a rod in hand. At Fishing Titan, I share hands-on tips, honest gear reviews, and everything I’ve learned about fish and ocean life, so you can fish smarter and enjoy every cast.
Share:

Meet Adam Hawthorne
I’m a lifelong fishing enthusiast who’s spent years exploring rivers, lakes, and oceans with a rod in hand. At Fishing Titan, I share hands-on tips, honest gear reviews, and everything I’ve learned about fish and ocean life, so you can fish smarter and enjoy every cast.
Related Articles
-
Crown Tail Betta
The Crown Tail Betta stands as one of aquaculture’s most distinctive ornamental fish, renowned for its dramatically elongated, spiky fins that resemble the spokes of…
-
Best Fishing Line for Bass in 2025: What Actually Works
I still remember the day I lost that monster largemouth on Lake St. Clair back in 2019. The fish hit like a freight train, and…
-
5 Deadly Trolling Tactics Big Fish Can’t Resist
The first time I watched a 40-pound king salmon completely ignore my perfect trolling setup, I wanted to throw my entire tackle box overboard. That…
-
Southern Platyfish
The Southern Platyfish, scientifically known as *Xiphophorus maculatus*, represents one of the most significant freshwater fish species in both wild ecosystems and the global aquarium…
Fish Species
-
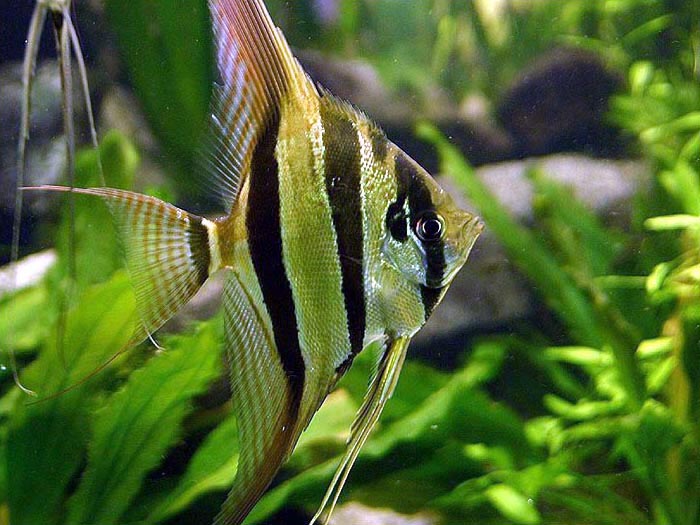
Angelfish
Angelfish represent one of the most recognizable and ecologically significant families of marine fish, encompassing over 85 species distributed across tropical and subtropical oceans worldwide….
-
Delta Tail Betta
The Delta Tail Betta (Betta splendens) represents one of the most recognizable and sought-after varieties within the aquarium trade, distinguished by its dramatic triangular caudal…
-
Molly Fish
The Molly Fish represents one of the most adaptable and ecologically significant freshwater species in tropical and subtropical regions worldwide. Known scientifically as *Poecilia sphenops*…
-
Dusky Shark
The Dusky Shark represents one of the most ecologically significant yet vulnerable large predators inhabiting coastal and pelagic waters worldwide. Known scientifically as *Carcharhinus obscurus*,…


